| Studio Lighting Techniques by Chuck McKern Most photographers are interested in portrait lighting but most seem not to understand how to do it. The techniques that we are going to discuss can be used with either hot lights or studio strobes. You can use these same concepts with flash units, however you will not be able to see the effect until after you shoot. With practice you will be able to control the harshness of the light as well as being able to de-emphasize problem areas, such as a narrow face or a round face. The wrong lighting will emphasize these features and will not be flattering to your subject. The right lighting will make your subject happy indeed.
If you get daring enough to use a hair light cones and snoots will allow you to control the light so that it only illuminates the hair and doesn't spill onto the shoulders and face of your subject. The hair light is a lower power light that illuminates the subjects hair providing separation from the background. This is especially important when photographing a subject with dark hair against a dark background. To properly place a hair light, you should bring the light forward enough to let the light spill onto the subjects face, then slowly move it back until the light disappears from the subjects skin. Background lights can be used to illuminate the background, gaining more depth or separation in your image. This light is usually placed low to the ground on a small stand about half way between your subject and the background. A low power light is generally used. You can dramatically change the look of the shot by adding a gel to background light. Just remember when using gels you have to use a stronger light to compensate for the illumination being lost through the gel.
The reflector cards do not need another light source, as they will reflect the light that is already there. To find the proper location for the card, just move it in and out from a spot to see the effect. It will be noticeable to the naked eye. It is not necessary to use all of these accessories and techniques together. For the most part they can be mixed and matched to get whatever result you're after. Although it sounds complicated with a little practice light placement becomes second nature and you'll develop a setup that you're comfortable with. It's when you need an effect you can't get with your normal set-up that you'll need some of these additional lights and accessories. Hopefully these articles will give you a better understanding of what equipment you might need and how to use it. Keep in mind there is nothing wrong if a simple setup/technique gives you the result you are looking for. Too many people think that lighting has to be complicated. Practice and experimentation will tell you what works best for you and I promise it gets easier after the first few times. |

 Once you have placed all your lights in their proper locations, added the needed accessories to them, and have gotten a general feel for the way the shot looks, you can use a reflector card to add a soft, supplemental light to areas that may still appear too dark. Some of these cards have a gold side that you can use to add a warm glow to the photograph. Others, like the one used in this shot, have a silver side to provide more neutral fill light.
 Studio lighting advice - Part 3 setting up your lighting
Studio Lighting - why you need it. Part 3.
By Chris Burfoot A.M.P.A.
Last month we looked at how a flashmeter worked and the use of different types of umbrellas.
In this month's session we are getting to the good bit - actually setting up your lights and taking your first portrait.
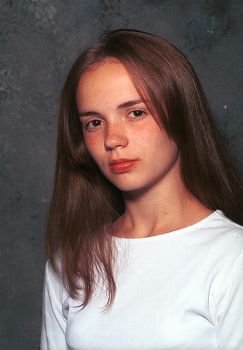
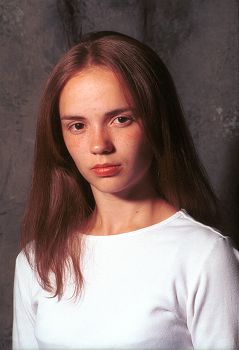
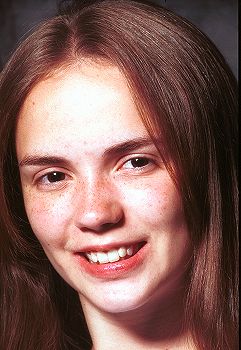
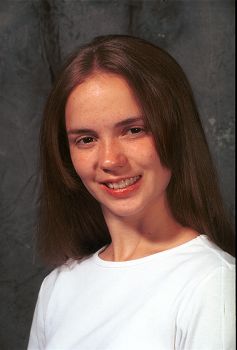
 OK, lets ask the question - 'Why might I need Studio Lighting?' This can be answered very simply, - versatility and control. If we put an 'on-camera' flashgun onto the hot shoe of our camera and take a picture of our model, this is what we will get. OK, lets ask the question - 'Why might I need Studio Lighting?' This can be answered very simply, - versatility and control. If we put an 'on-camera' flashgun onto the hot shoe of our camera and take a picture of our model, this is what we will get. Very harsh direct light, probably 'red-eye', certainly a hard and un-flattering light with a big black shadow behind the head, which, on a darker haired subject will merge with the hair to give a strange shaped head! You will also end up with a very unhappy subject! The other problem is that this lighting is very flat. It shows no shape or substance to the subject whether it is a person or a product. To show that something is 3 dimensional on a photograph it has to have shadows, not big hard-edged ones but soft gentle ones. By moving our light source around to one side we have immediate advantages. Firstly the shadow has gone from the background. Secondly, we have a lit and an un-lit side to our subject. Even though we have 'over-done' the contrast between the two sides of our models face it tells our brain that the subject MUST be 3D even though we are looking at a 2D image. |
|  |

To relieve the density of the shadow we need also to put a bit of light into that side. If we have one, we could add a second light. We would need to be very careful with the amount of light we used as a fill light. Too much and we would be back to flat lighting plus the complication of two sets of shadows! A good friend of mine who also teaches lighting says that the only person who should have two nose shadows is a person with two noses!
Lets forget the second light for now and use instead a simple reflector panel. By adding a Prolinca Silver 'pop-up' reflector on the shaded side we can bounce some of the light back into the shadows. Simply moving the reflector closer or further away will vary the amount of reflected light. Silver reflector panels are very efficient; a more subtle effect can be obtained by the use of a white one. But it is quite amazing how much light can be bounced back. In our example we have placed the reflector quite close but even so we have retained some very attractive modelling on the subjects face.
 |  |
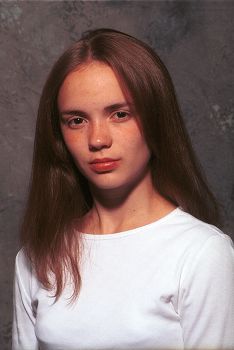
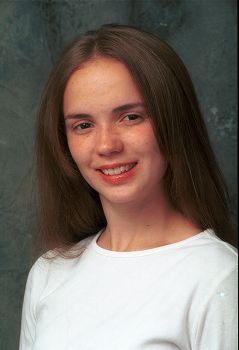
So far we have just used the flash head on its own. Now lets add a silver umbrella to diffuse and soften the light. Silver umbrellas are, like the reflectors, very efficient and give a 'sparkly' light suitable for young people with good skin and glamour type pictures.
 |  |
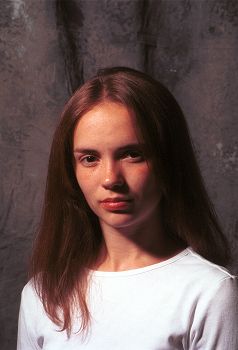
For a more natural, softer look, a white umbrella and reflector could be used.
We have seen that by moving our light to one side we can make our subject more three-dimensional. The pictures, however, can still look a little flat especially if you are using a low contrast background. So lets now unpack that second head and add a bit of extra depth to our portrait.
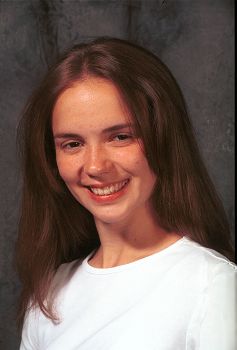
By placing a second head behind our model we can put a pool of light on the background. Both Fabric and paper backgrounds absorb light and unless they are lit they can look quite boring. We have to be careful where the light from our second head goes, so to control it we can fit either a snoot or honeycomb grid to the front of the head so that the light only goes where we want it. By adding a splash of light on the background we have livened up the whole picture and given it more depth.
 |  |
But now lets try something else. We can also turn our second head around so that we are backlighting our model. As you can see a little light from behind gives great separation from the background and brings the hair to life showing its true texture and colour. The splash of light over the left shoulder further emphasises the shape of our model
 |  |
No comments:
Post a Comment