Friday, December 28, 2007

Creating Vignettes in Photoshop CS3 (text, photos & video)


clipped from blog.epicedits.com

Quick Tip: Using Photoshop to Add Vignette

By Brian Auer • September 18th, 2007

Vignette (pronounced vin-'yet) is a sort of framing element that you'll sometimes see in photos (particularly older photos or Lomo shots), in which the image fades out toward the corners. It's most commonly seen as a fade out to black, but white is also used sometimes. The vignette can be a powerful element of the photo because it has a natural tendency to draw the eye toward the center of the photo.

Comparison of vignette versus no vignette

Vignette can be produced naturally if you're using a lens intended for a smaller medium (like using a dSLR lens on a film SLR), because parts of the lens actually block out some of the light from hitting the sensor or film. There are a few other methods of getting the vignette effect, but the simplest of them is with Photoshop. Also, using Photoshop will allow you a wider range of control since it can be adjusted many times without destroying pixels.

The following Photoshop techniques are non-destructive (destroying pixels is a bad thing, and it's downright mean) and easy to adjust. Now listen closely, and do as I do:

  1. DO THIS AS YOUR LAST STEP IN PHOTOSHOP!!!
  2. Create a new empty layer on top of the stack. Ctrl + Alt + Shift + N
  3. Fill the layer with pure white. Shift + Backspace
  4. Set the blend mode to "Multiply". Alt + Shift + M
  5. Apply the vignette filter to the new layer.
    Filter >> Distort >> Lens Correction…
  6. Mess with the "Amount" and "Midpoint" sliders in the "Vignette" section.
  7. Press "OK", and now you have art!

You've officially added vignette to the photo in a non-destructive manner using Photoshop. If you decide to come back to the photo at a later time and you want to change the vignette, just refill the top layer with white and repeat lens correction. This isn't the only way to do this (and I apologize to those who don't use Photoshop), but its the easiest and safest way that I know of.
This is a video tutorial that also deals with vignetting in Photoshop CS3" in a few different ways:


Studio Lighting 8 of 8 - Ken Henderson (video)

Studio Lighting 7 of 8 - Ken Henderson (video)

Studio Lighting 6 of 8 - Ken Henderson (video)

Studio Lighting 5 of 8 - Ken Henderson (video)

Studio Lighting 4 of 8 - Ken Henderson (video)

Studio Lighting 3 of 8 - Ken Henderson (video)

Studio Lighting 2 of 8 - Ken Henderson (video)

Studio Lighting 1 of 8 - Ken Henderson (video)

Seamless Background for Table Top Photography (video)

Table Top Photography Tutorial (text & photos)


clipped from www.shortcourses.com
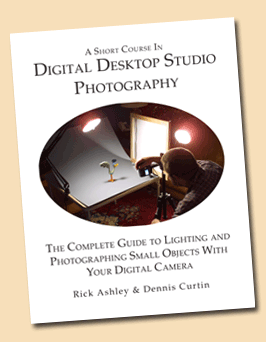
CHAPTER 1. THE CAMERA IN THE DIGITAL DESKTOP STUDIO CHAPTER 2. THE DIGITAL DESKTOP PHOTO STUDIO CHAPTER 3. CASE STUDIES FROM THE DIGITAL DESKTOP STUDIO


Welcome to
Digital Desktop Studio Photography
The Complete Guide To Lighting and Photographing Small Objects with your Digital Camera


DIY Light Tent (text & photos)


I spent a rainy Saturday morning making a cheap, home made light box. Here's my ghetto set up. Build pictures were taken with my wife's P&S.
Comments or criticizims always welcome.

The build...


The parts list..


The test...


Get Clipmarks - The easiest way to email text, images and videos you find on the web. It's free!
Sent with Clipmarks

Light Box / Tent (text & photos)


clipped from www.pbase.com

Light Box / Light Tent


If this gallery has helped you, vote for it at the bottom of the gallery so others will see it and it can help them also.
You may want to read thought the comments at the bottom of the page, some different ideas on lights and how to make it.

Here is a website tutorial done by a friend of mine, Kevin Criscione that may help also.


Follow these instrutions to build a light box.
You will need the following items:

Hacksaw or fine cut wood saw.
File or some 80 or 100 grit sandpaper.
Screw Driver
A carpentars square or something like it to get things square.

3 - 1/2 x 5ft. CPVC pipe. $1.34 ea.
4 - 1/2 CPVC Tees, $.24 ea.
4 - 1/2 CPVC Street Elbows. $.24 ea.
4 - 1/2 CPVC Caps $.23 ea.
1 - Can CPVC Cement. $2.35
3 - Number 6 sheetmetal screws. $.04 ea.
1 - Twin bed sheet. $5.49
I have used all 1/2 inch CPVC pipe and fitting on the whole project. The sizes here will make a nice desktop Light Box, you can make it any size you want or need. Just remember you will need 2 pices the same size for the width and 2 of the same size for the depth. The 4 legs will all be the same. I did not use the cleaner on the pipe before I glued it, I just don't plan on running any water thought it so I see no need for it. The glue holds just fine without it.
Parts Needed
I have used all 1/2 inch CPVC pipe and fitting on the whole project. The sizes here will make a nice desktop Light Box, you can make it any size you want or need. Just remember you will need 2 pices the same size for the width and 2 of the same size for the depth. The 4 legs will all be the same. I did not use the cleaner on the pipe before I glued it, I just don't plan on running any water thought it so I see no need for it. The glue holds just fine without it.
Cut all pieces that you need. After you have cut all your pipe pieces you will need to clean the burrs from the ends of each pipe. The inside is not important but the outside should be clean and free of burrs. Set them on end and check that all the pieces are the same length. If needed sand or file them to the correct length.
Burrs
Cut all pieces that you need. After you have cut all your pipe pieces you will need to clean the burrs from the ends of each pipe. The inside is not important but the outside should be clean and free of burrs. Set them on end and check that all the pieces are the same length. If needed sand or file them to the correct length.
Putting the top frame together. Dry fit everything together before you glue. Lay all the pieces on a flat suffice and put all part together to make sure they fit. Then do one corner at a time glue the parts together. Make sure you square each part with the other as you glue it. The glue is not real fast so you do have time to get the part squared up with the others.
Top Frame
Putting the top frame together. Dry fit everything together before you glue. Lay all the pieces on a flat suffice and put all part together to make sure they fit. Then do one corner at a time glue the parts together. Make sure you square each part with the other as you glue it. The glue is not real fast so you do have time to get the part squared up with the others.
Glue the Caps on the legs. Install the Street Elbows on the legs but DO NOT GLUE. I have 2 sets of legs, one is 12in. and the others are 14in.
Legs
Glue the Caps on the legs.
Install the Street Elbows on the legs but DO NOT GLUE.
I have 2 sets of legs, one is 12in. and the others are 14in.
Lay top frame on a flat surface. Place the glue on the street elbow and glue it to the top frame. Make sure it is square to the top frame. I used a carpenter square for this. Let set for a minute or so and then finish the other 3 leg in the same manor.
leg to frame
Lay top frame on a flat surface. Place the glue on the street elbow and glue it to the top frame. Make sure it is square to the top frame. I used a carpenter square for this. Let set for a minute or so and then finish the other 3 leg in the same manor.
This is what it will look like when complete. You can use the frame like it sets or on end if you need more hight. I have 2 sets of legs, a 12 in. and the 14 in.
The Frame
This is what it will look like when complete. You can use the frame like it sets or on end if you need more hight. I have 2 sets of legs, a 12 in. and the 14 in.
I added 3 sheet-metal screws to the top rail. I use a paper punch to punch the holes in my backdrops to hang them on. The backdrops are just heavy paper that cost 84 cents each at the hobby store. I have blue, gold, silver, white backdrops.
Blue backdrop
I added 3 sheet-metal screws to the top rail. I use a paper punch to punch the holes in my backdrops to hang them on. The backdrops are just heavy paper that cost 84 cents each at the hobby store. I have blue, gold, silver, white backdrops.
These are the lights I use, they are very cheap, the 2 small ones cost $4.78 each and the 2 larger ones were $9.00 each. I have 75 Watt spots in the large lights and the small one are 20 Watt.
Cheap Lights from Lowes
These are the lights I use, they are very cheap, the 2 small ones cost $4.78 each and the 2 larger ones were $9.00 each. I have 75 Watt spots in the large lights and the small one are 20 Watt.
I am using 50 or 75 watt light bulbs. The ones I have right now are J3 Long Neck-58 Tungsten Halogen CAPSYLITE PAR30 Long Neck Reflector Lamp Medium Base 75Watt 120Volt Wide Flood Beam. I got them at Lowe's also.
The bulbs
I am using 50 or 75 watt light bulbs. The ones I have right now are J3 Long Neck-58 Tungsten Halogen CAPSYLITE PAR30 Long Neck Reflector Lamp Medium Base 75Watt 120Volt Wide Flood Beam.
I got them at Lowe's also.
I have been using these bulbs as of late. They are much much cooler and the light is very good. I still set a custom White Balance (WB) with my Expo/Disc I got these at Home Depot they are N:Vision and have a color temp. of 3500k.
Other bulbs
I have been using these bulbs as of late. They are much much cooler and the light is very good. I still set a custom White Balance (WB) with my Expo/Disc
I got these at Home Depot they are N:Vision and have a color temp. of 3500k.
You can also pull the sheet over the front and cut a hole just for the lens. I have at times use a light on top, I have a plan desk light that I use for that.  Watch the heat of the lights, they do get hot and you don't want them to come in contact with the sheet.
The Box in Use
You can also pull the sheet over the front and cut a hole just for the lens. I have at times use a light on top, I have a plan desk light that I use for that.

Watch the heat of the lights, they do get hot and you don't want them to come in contact with the sheet.
Sample image, Taken in light box with a blue equipment pad as a backdrop.
Olympus C-700
Sample image, Taken in light box with a blue equipment pad as a backdrop.
Sample image, taken in the light box with a blue paper backdrop. Lights more to the front of the light tent.
P9237430-01a.jpg
Sample image, taken in the light box with a blue paper backdrop. Lights more to the front of the light tent.
Sample Image, Taken in light box with a gold backdrop.
Hard Drive
Sample Image, Taken in light box with a gold backdrop.
Sample image, Using light box and one small light on the inside.
Glasses of color
Sample image, Using light box and one small light on the inside.
Sample, Taken with the light box.
Buttons Buttons Buttons
Sample, Taken with the light box.
Sample image, Taken in the light box with a silver backdrop.
Toys
Sample image, Taken in the light box with a silver backdrop.
Sample image, Taken with black form board on the bottom and one of the little lights in back with a red filter in front of it. I just used one small light on the left side of the boxe for the white light.
Glass cubes
Sample image, Taken with black form board on the bottom and one of the little lights in back with a red filter in front of it.
I just used one small light on the left side of the boxe for the white light.
Using a gray backdrop and the one light in front.
Coin
Using a gray backdrop and the one light in front.
Using a gray backdrop and two lights
Coin
Using a gray backdrop and two lights
PC039115.JPG
PC039115.JPG
Using a cloth for the backdrop and the small lights to give high-lites to the knife.
P9044734.JPG
Using a cloth for the backdrop and the small lights to give high-lites to the knife.
P2140308.JPG
P2140308.JPG
P4203585-01a.jpg
P4203585-01a.jpg
This was taken in the light box with no lights on the outside of it. The lights I use were the small one and had them shinning directly on the rock.
The rock
This was taken in the light box with no lights on the outside of it. The lights I use were the small one and had them shinning directly on the rock.
Get Clipmarks - The easiest way to email text, images and videos you find on the web. It's free!
Sent with Clipmarks

How much of this blog did you find useful? Be honest!